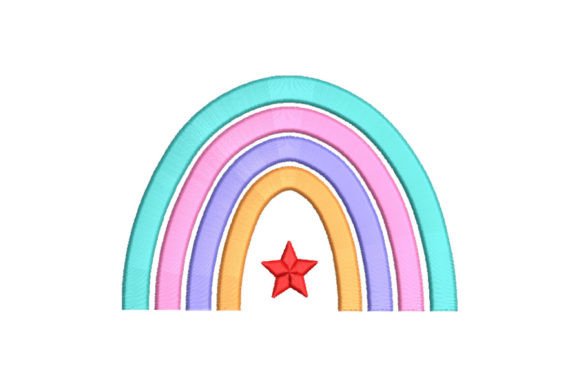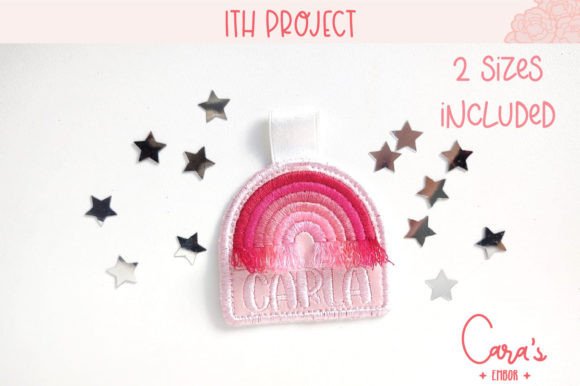
Fringe Rainbow Name Tag - ITH Project Review
How It Performs on Different Products
The versatility of the Fringe Rainbow Name Tag - ITH Project is one of its biggest selling points. Whether applied to tote bags, aprons, tea towels, or even small fabric pouches, the design maintains its character while adapting well to different surfaces and scales.
- Tote Bags: On a cotton canvas tote, the rainbow becomes a standout feature. The fringe adds dimension, and the name tag placement makes it easy for customers to imagine customizing their own. Just make sure to test thread contrast against darker bag colors.
- Aprons: As an apron embroidery, it looks festive and functional. The size options help ensure it doesn’t overwhelm the front pocket or get lost in a large field.
- Tea Towels: The ribbon technique file is particularly useful here. The textured stitches pop against smooth linen or cotton, and the bright colors photograph beautifully for online listings.
- Embroidered Patches: For patch sellers, this design works as a ready-to-apply accent. The smaller size fits nicely on denim jackets, backpacks, or onesies, adding a splash of color without being too busy.
- Caps & Hats: The curved surface of caps may present a challenge. Because of the stitch direction and density, some areas might need adjustment to lay flat. But if placed correctly, it becomes a cute and colorful headpiece embellishment.
- Pillow Covers & Market Bags: These are ideal for showing off the larger version of the design. The fringe creates a subtle 3D effect, and the rainbow offers a sense of joy and celebration.
Practical Selling and Production Considerations
This design is easy to understand at a glance, which is essential for booth displays where customers scan quickly. The rainbow shape and fringe details catch the eye from a distance, making it a natural focal point on any item. That said, it also functions well as a smaller accent when using the 4×4 hoop size.
Photographically, the design performs exceptionally well. The high contrast between the rainbow and background fabric (when chosen carefully) makes it pop in photos. Use bright lighting and clean backgrounds to highlight the playful nature of the design. Printable mockups will further help showcase how it looks on different items like tote bags or aprons.
In terms of batch production, the design is repeatable but requires attention to stabilizer use and fabric choice. Stitch density is moderate, so thick or textured fabrics may cause puckering. Stick to mid-weight cottons or quilting cottons for best results. If you're planning a large order for your booth, consider creating a few samples first to assess durability and appearance after washing.
What Works Best for Sales
- Personalized baby onesies or hoodies
- Festival-style tote bags or reusable market bags
- Handmade kitchen towels or dish cloths
- Ribbon-trimmed patches for kids’ backpacks or jackets
- Mini fabric pouches with names added for baby showers or gifts
Careful-Use Notes for Optimal Results
- Dense Stitch Areas: The rainbow body and fringe edges require careful management of stitch density. Too much tension or over-stitching can lead to distortion, especially on stretchy or thin fabrics.
- Tiny Details: The name tag portion includes small lettering. Always check the font size and clarity before finalizing your embroidery layout. Some fonts may lose legibility when scaled down.
- Thick Fabric or Textured Towels: The ribbon technique may struggle on very dense or napped materials. Test on similar fabric to your intended end product to avoid disappointment.
- Dark Fabrics: Thread contrast is critical. Lighter thread colors won’t stand out on black or navy bases. Choose lighter or pastel shades for visibility.
- Curved Surfaces: When applying to caps or curved surfaces, adjust the placement to match the curvature. Otherwise, the design may appear stretched or misaligned.
- Smaller Sizes: At the smallest scale, the design may lose some of its charm. Ensure that the name area is still legible and the overall composition remains balanced.
Professional Embroidery Designer Tips
- Test on Scrap Fabric: Always try the design on a sample of your planned fabric. Pay attention to how the fringe lays and whether the name section holds up after washing.
- Check Thread Contrast: Especially if you plan to sell it on dark-colored products, confirm that the rainbow colors are visible and not muddied by the base fabric.
- Review Spacing: Make sure the design isn’t too cramped, especially if you're including text. Proper spacing enhances readability and visual appeal.
- Confirm Hoop Size: The design is available in two sizes, 4×4 and 5×7 hoops. Be clear about which hoop size each design variation uses to prevent customer confusion.
- Inspect Stitch Density: Adjust stitch settings if needed for your specific machine and fabric. Avoid overstuffing the design area to maintain quality and reduce machine strain.
- Use the Right Stabilizer: A good backing is essential for preventing puckering and ensuring the fringe hangs properly after embroidery.
- Create Real Mockups: Before listing on Etsy or preparing for a craft fair, make a few real-life examples. This helps you see how it performs under different conditions and gives you authentic product shots.
- Compare Fabric Colors: The same design can look drastically different on white versus light blue or gray. Showcase variations in your listings to give buyers a full picture.
- Confirm Commercial Licensing: Since this is a digital embroidery file meant for commercial use, double-check licensing terms before producing for sale. This is vital for protecting your business and staying compliant.